I am finally getting around to posting about our craft night, thanks to The Pinterest Challenge, hosted by Sherry from Old House Love and her posse. I was very inspired by a lot of pins I saw on Pinterest, I listed them in my last post, but here are a couple of my favorites again.
I think this is such a modern, fresh take on the time-old tradition of cross-stitch and it seemed perfect for DIY. I jumped on the computer, made myself a design, and got started. I used Adobe Illustrator, set my artboard to the size of the canvas I planned to use, chose the number 5 (for 5 in my family), and added crosses until my eyes couldn't see straight. I put the number 5 on one layer, in the font I liked, and then made my crosses in a layer on top, matching them to the number below as best I could. I used 3/4 inch crosses. After I chose this project for craft night, I helped my friends design their projects too and generally used the 3/4 inch crosses again. Even with a large canvas, 24" x 36", I found anything larger gave me not enough control over detail. And for some designs, like the chicken below, I used smaller crosses for some detailed area.
Next I spray painted my canvas, although most of my friends used craft paint and a foam brush. I would love to try one over fabric, like a burlap or a small-print flowered muslim or something. It would be harder to mark where the stitches should go, but I did buy a fabric ink pen, with disappearing ink. I'm anxious to try it soon. I would recommend wrapping and stapling the fabric to a canvas, just to keep the structure and make it easier.
After the paint was dry on my canvas, I printed off my design, which necessitated multiple pages taped together sometimes, and attached it to the canvas with some of my washi tape, whose low-tack & removability were perfect for this project. Then I took a needle and drove it down through the paper & the canvas below. The hole remains in the canvas to show you where to stitch. That's where fabric would be a little trickier than the canvas, although that disappearing ink pen must be so much easier on the fingers than stabbing through the canvas with a needle. A thimble helped. I learned a few things on the first row. Don't stab through the middle of the Xs, only the corners. I made that mistake on the first row, but the holes were covered up when I did the stitching. Also, my design ran fairly close to the edge of the canvas, over the wooden supports, which made it pretty hard to put a needle through. You might keep that in mind when creating your design. My friends poster-size canvas had a support right up the middle too - which made it difficult to stitch around, but canvas is flexible and we worked around it.
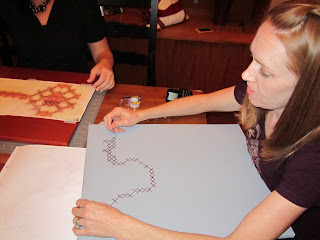
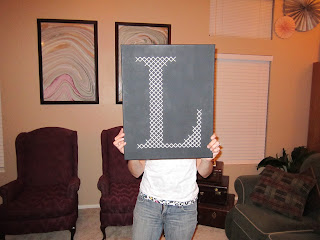
And then we got to stitching. Some used yarn (for the big canvas), some used embroidery floss, the white one was a thick baking string, and I used a hot pink mason twine, which is nylon and sold at Home Depot. Long needles worked well, although I had to use one with an extra-wide eye to keep my mason twine from unraveling. Which made it quite hard to punch through the canvas. I was getting blisters before I heard about the idea of using rubber gloves. I felt pretty silly wearing my long, yellow dish gloves, but it worked like a charm. You just follow basic cross-stitch principles, tie a knot, come through from the back, and get to work, tying off in the back when you run out of string. You'll have to find better instructions elsewhere. ;) It took a few hours to complete, but Netlix helped while the time for me, and my craft group is always happy to use the time to catch up on each other's lives, gossip, and discuss important philosophies. Here are some shots of us working, and a few of the finished projects.
I am so thankful to Pinterest for keeping me appraised of great art and projects, you can follow me here. And I'm glad for Sherry's Pinterest Challenge and for my turn to host craft night for impelling me to actually complete some of the things I pin. My friends' projects turned out so cute too & I'm sure they are livening up their houses by now.


.JPG)
.JPG)


5 comments:
I must have missed this on Pinterest. I really like how these came out.
Now I have *another* project to add to my list :)
What a cute project!... Kudos to you for making it happen :)
very cool. love it.
Cute! I did a initial wall art too.
http://www.onthedesignlane.com/
Levi loves his cross stitch. He points at it and says, "hammer, screwdriver, wrench!"
Post a Comment